1. Bake (and cool) some cupcakes.
A standard box of cake mix usually makes 20-24 cupcakes. Bake the cupcakes so that the edge of the cupcake is just a little below the top edge of the cupcake paper. That seems to leave just about the right amount of space for frosting.
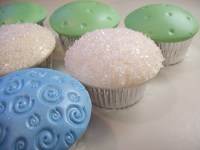
We really like the silver cupcake papers but then again - we're easily distracted by shiny, pretty things.
2. Lightly frost the cupcakes.
The idea is to use enough frosting to stick the Cupcake Caps on but not so much as to raise the cap like a bonnet on Marge Simpson.
Whether you're using a pastry tube (this is great for doing it quickly) or tub-o-frosting and a butter knife, generally cover the top of the cupcake, with a slight "heap" or point in the middle of the top. This ensures that at least some of the frosting will make contact with the underside of the Cupcake Cap.
3. Stick 'em on!
Ok - now we're being serious... this part is important. Feel free to pay attention. : )
Unwrap the Cupcake Cap and gently place it, inside curve up, in the palm of your clean, dry hand. With your other clean hand, pick up your frosted cupcake and gently "screw" or wiggle the cap onto the top of the cupcake.
Don't FORCE or PUSH or JAM the Cupcake Cap on. It will break or buckle (remember - these are edible).
Additional Notes:
Cupcake Caps are meant for standard sized cupcakes. If your standard size cupcakes are too tall, don't feel bad about trimming them down/back. A steak knife works great.
If your frosting has dried out, it won't "glue" very well. Lightly moisten or dab on some frosting gel. That should make them stick.
Cupcake Caps soften slightly as they absorb the moisture of the frosting. Don't worry - this is normal and desirable.
 Check out our
in-stock
Check out our
in-stock